Mixpanel

 photo HilaryStoneSoupHeader-ABOUT.png photo HilaryStoneSoupHeader-RECIPES.png photo HilaryStoneSoupHeader-TRAVELGUIDES.png photo HilaryStoneSoupHeader-ESSENTIALS.png photo HilaryStoneSoupHeader-CONTACT.png

Monday, June 30, 2014

Santa Fe Snaps

Happy Monday everyone! I spent the later half of last week in Santa Fe, where I not only got to see one of my favorite people get married (Congratulations Robin and Brian!), but also got to partake on some awesome food adventures.

On Saturday, Zach and I ventured over to the Railyard District for the largest farmer's market in the Western United States. So many unique stalls, featuring awesome produce, baked goods, and of course, chiles.

Railyard District
Apple Cider
Apple cider shaved ice--so refreshing and necessary when its 95+ degrees out!
DSCN2232
Isn't this garlic beautiful?!
Pepper Wreath
The perfect addition to a front door in Santa Fe
Outside view
The market really is huge!
Blue Corn Blueberry Lavender Donut
These Blueberry Lavender Blue Corn donuts from Whoo's Donuts really were the bomb dot com. 
Inside the market
Inside the market
Zach and Hilary
Thank you nice old lady that took our picture!
After the farmer's market, Zach and I made our way over to Canyon Road to visit some galleries. Once our feet got tired of looking at all of the amazing art, we made our way over to the Kakawa Chocolate House for some respite (and hot chocolate, despite the temperature outside).

Cute blue and white mug
Aren't these the cutest blue mugs ever?!
We ended the day with margaritas and chile cheeseburgers. There is still so much to do (and eat!) in Santa Fe, but we will have to wait for our next trip...

What summer vacations do you have planned?

Wednesday, June 25, 2014

Favorite Finds: Caviar

There are so many new food delivery service companies! It seems like almost every single startup I read about is the new Seamless. While I love that startups (and VC firms!) are starting to pay attention to food, I start to wonder how these delivery startups are going to differentiate themselves.

Caviar, one of these food delivery service companies, has really impressed me though! They focus on bringing you food from the top restaurants in your area. They have an AWESOME list of restaurants--San Francisco's choices include A16 and Craftsman and Wolves. DC's restaurants even include Toki Underground! Imagine, delicious chicken curry ramen without the wait in line.


Because the delivery fee is pretty steep ($9.99 an order), I suggest going in on an order with either cowokers or friends. My friends and I are already planning our night in with a great movie and some Toki.

You can sign up for Caviar here: www.trycaviar.com


Monday, June 23, 2014

Classic Devil's Food Cupcakes with Vanilla Buttercream Frosting

Buttermilk Devil's Food Cake

Today's my birthday which is making this Monday pretty wonderful! Though I am sad I can no longer claim "22" as my song (okay, mine and about 30,000 other people's "song"), I am excited for new adventures over the upcoming year. This year's goal: working my happiness like it's a full time job.

Of course, every birthday has to include cake. One my personal favorites is this devil's food cake recipe from the Cake Mix Doctor. Yes, it includes cooking from a cake mix BUT the results are amazing. The cake mix means it's easy to put these together, but the buttermilk and extra cocoa powder lend an intense flavor. 

These are perfect for any one's birthday, or really any celebratory event!

Devil's Food Cupcakes with Vanilla Buttercream Frosting

1 package (18.25 ounces) plain devil's food cake mix
3 tablespoons unsweeted cocoa powder
1 1/3 cups buttermilk
1/2 cup vegetable oil, such as canola, corn, safflower, soybean, or sunflower
3 large eggs
3 teaspoons pure vanilla extract
1 stick butter, at room temperature
3 cups confectioners sugar, sifted
3-4 tablespoons whole milk

Place a rack in the center of the oven and preheat the oven to 350 degrees F. Put cupcake liners in a cupcake pan. Set aside.

Buttermilk Devil's Food CakePlace the cake mix, cocoa powder, buttermilk, oil, eggs, and one teaspoon of vanilla in a large mixing bowl. Blend with an electric mixer on low speed for 1 minute. Stop the machine and scrape down the sides of the bowl with a rubber spatula. Increase the mixer speed to medium and beat 3 minutes more, scraping down the sides again if necessary. The batter should look well blended.

Buttermilk Devil's Food Cake

Divide the batter into the cupcake pan. Bake until the cupcakes spring back when lightly pressed with your finger and just start to pull away from the sides of the pan (about 15-20 minutes). Remove the pan from the oven and place it on a wire rack to cool for 10 minutes. Remove the cupcakes from the pan and let cool completely. 

Buttermilk Devil's Food Cake

For the frosting: Place the butter in a large mixing bowl. Blend with an electric mixer on low speed until fluffy, 30 seconds. Stop the machine and add the confectioners' sugar, two teaspoons of vanilla, and 3 tablespoons of milk. Blend with the mixer on low speed until the sugar is incorporated. Increase the speed to medium and beat until light and fluffy. Blend in up to one tablespoon milk if the frosting seems to stiff.

Buttermilk Devil's Food Cake

Decorate cupcakes accordingly!

Buttermilk Devil's Food Cake

Thursday, June 19, 2014

Back to Basics: Blueberry Crisp


Can you believe it is already Day 4 of Berry Week?! For our fourth berry recipe of the week, I am bringing you a classic, blueberry crisp.

There is nothing quite as delicious during the summer as warm, juice berry topped with a crispy butter and brown sugar topping. Crisps feel so simple, so nostalgic, so down to earth, yet they are elegant enough for your fanciest dinner parties this summer.

Blueberry crisp served warm, and topped with a scoop of vanilla ice cream...this is what summer is all about.
 

Blueberry Crisp

from Saveur 

6 cups (3 pints) blueberries, washed and stems removed
1/2 cup granulated sugar
1 1/4 cups flour
2/3 cup brown sugar
Pinch of salt
10 tbsp. cold butter

Preheat over to 350 degrees. Toss together the blueberries and sugar in a bowl, then transfer to a medium baking dish.


Combine flour, brown sugar, and salt in a bowl. Using two knives (or a pastry blender), work the butter into into small pieces. The mixture should look like coarse meal. 


Sprinkle mixture evenly over blueberriies.

Bake until berries are bubbling and topping is golden, about 50 minutes. Allow to cool for 15 minutes. Serve warm or at room temperature (ideally with vanilla ice cream)!


Wednesday, June 18, 2014

Brown Butter Raspberries


Welcome to Day 3 of Berry Week! All week I am featuring berry recipes in celebration of summer.

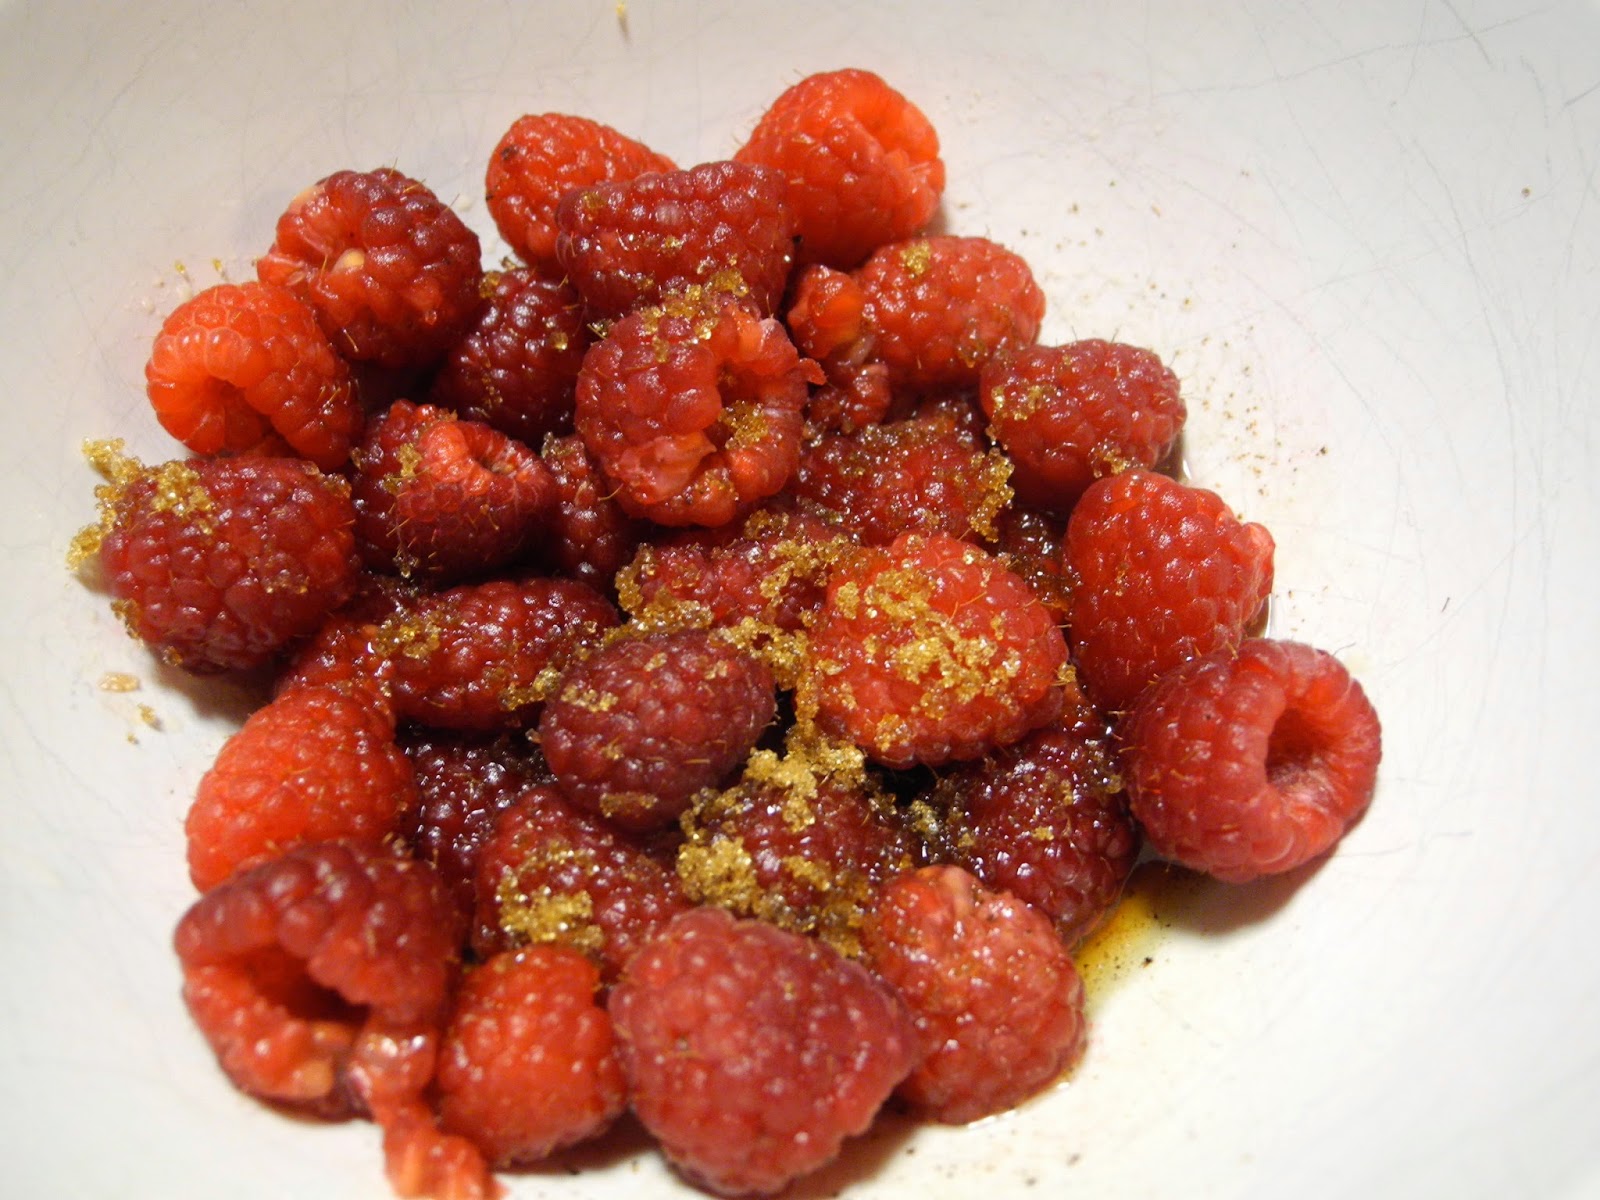
Today's recipe is a delectable combination of raspberries and a browned butter sauce. The vanilla and raw sugar add a touch of sweetness. I promise, your kitchen will smell divine! Imagine eating a fresher, better version of raspberry pie filling.

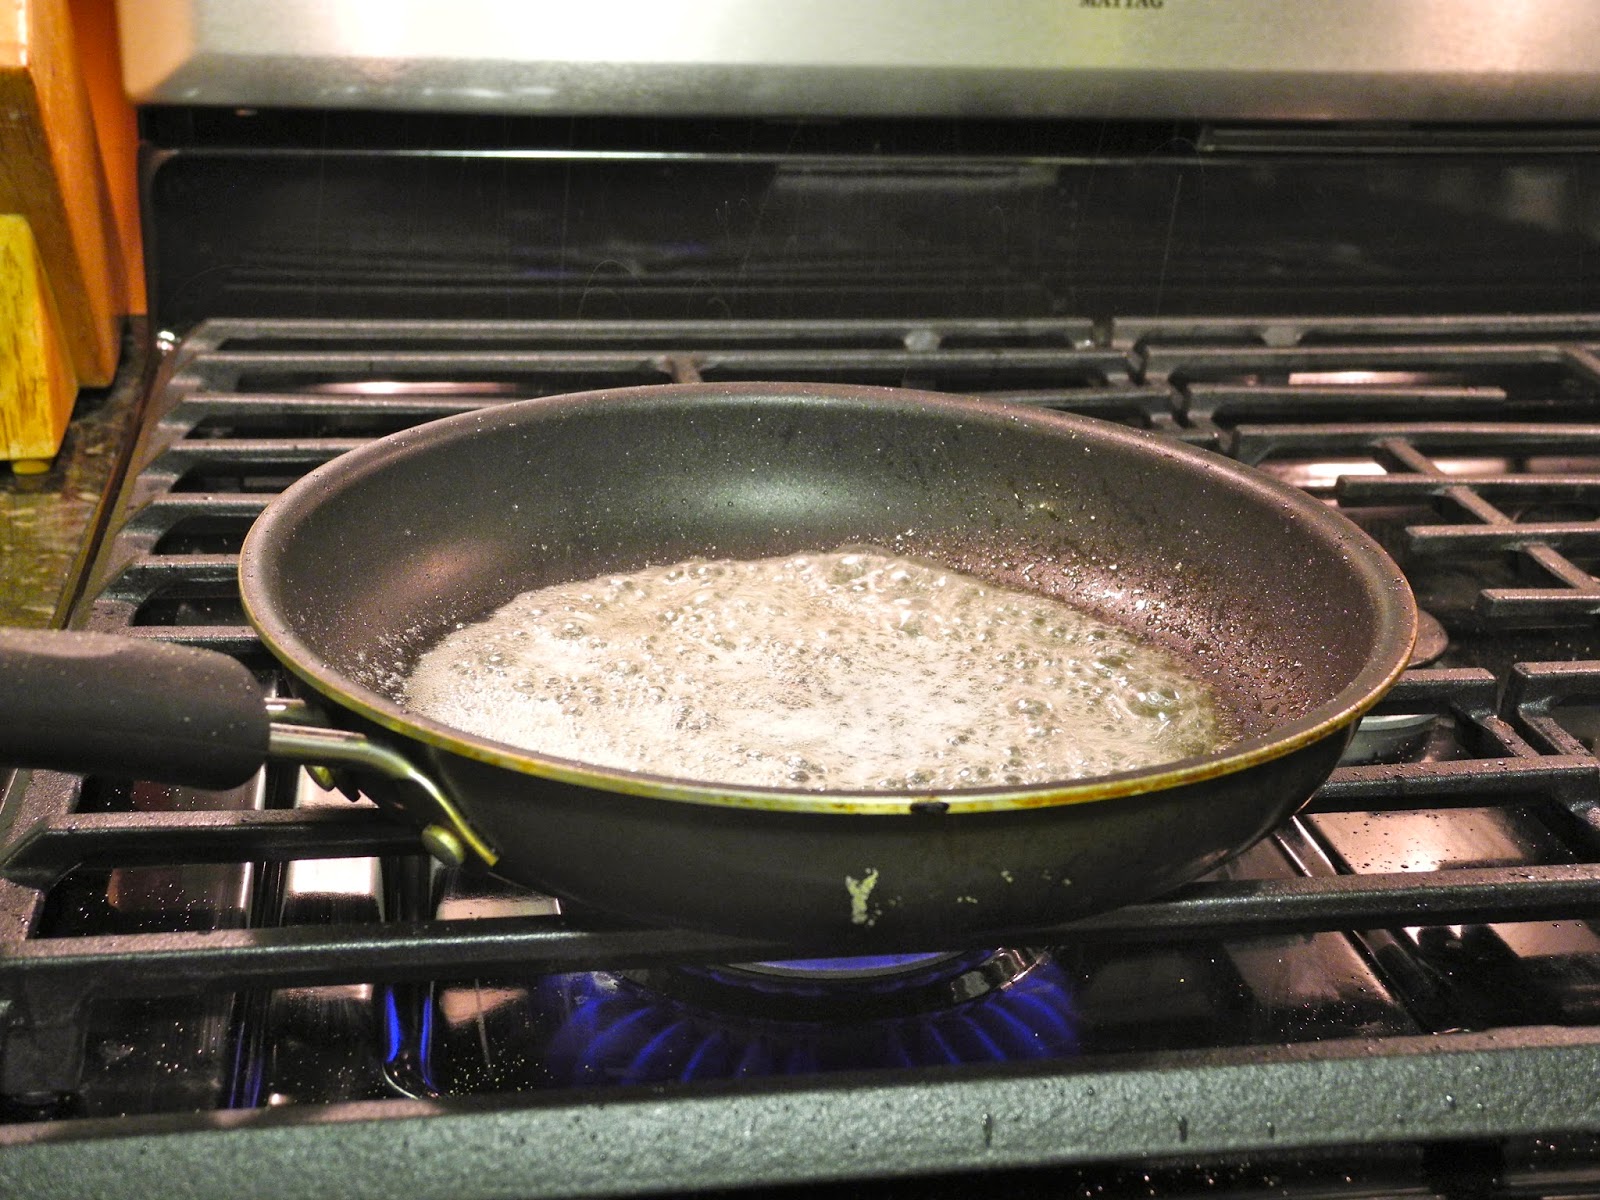
It took me less than five minutes to pull this recipe together, and the results were absolutely delicious. The vanilla instantly vaporized in the pan, creating a nutty and warm scent throughout my kitchen.

While this recipe was created for raspberries, it would be equally delicious on peaches! I love this recipe because it dresses up some plain fruit, without making it over the top.

Brown Butter Raspberries

from Food52

16 ounces raspberries
4 tablespoons unsalted butter
1/4 teaspoon vanilla extract
Raw or brown sugar, about 1/2 teaspoon per bowl

Divide the raspberry amongst four shallow bowls. 


Drop the butter in a small saucepan and place over medium heat. Melt the butter and let it bubble and boil. Stand back--it may spit! When the butter begins to brown on the edges, give it a light stir so the butter browns evenly. Remove the pan from the heat as soon as the butter begins to smell nutty. Add the vanilla.


Spoon the butter over the raspberries and sprinkle with sugar. Serve right away--it is best eaten while warm! Mix up the berries, and dig in!


Tuesday, June 17, 2014

Berries with Greek Yogurt Creme Brûlée


In celebration of Berry Week, Day Two, I bring you a tangy, slightly sweet combination of berries of and yogurt. 

The best thing about creme brûlée is the crunchy caramelized sugar top, that cracks every so beautifully with your spoon. So when I saw this recipe for Greek yogurt with the same addictive topping, I knew it was a match made in heaven.

This dish is perfect for weekend brunches. It seems impressive thanks to the burnt crust, but it couldn't be any easier! It's a delicious marriage of berries, granola, yogurt, and caramel that would please even the pickiest of eaters.

Now, this recipe does turn out better if you follow Bobby Flay's instructions exactly and use a kitchen blowtorch. Since my blowtorch is still sitting in a Sur La Table waiting for me to purchase it, I used the broiler on high heat. While mine did not come out quite as beautifully as Bobby Flay's, they were equally delicious!

Berries with Greek Yogurt Creme Brûlée

Recipe from Bobby Flay

16 ounces 2-percent Greek yogurt
1/2 vanilla bean
2 cups fresh berries
1/2 cup granulated sugar, plus more
2 teaspoons fresh lemon juice
1/2 cup granola

Remove the seeds from the vanilla bean. Combine the vanilla bean seeds and the yogurt in a bowl, then place in the refrigerator for at least 30 minutes.

Put the berries in a small saucepan with 1/4 cup of water, and cook over medium heat until the berries are softened, about 3 minutes. Remove from the stove and stir in lemon juice and 1/2 cup of sugar. Let cool slightly before dividing the mixture equally amongst 4 eight ounce ramekins.


Sprinkle the granola over the berries, then spoon the yogurt over the top, filling the ramekins. Cover and place in the freezer for 5 minutes.


Remove the ramekins from the freezer and sprinkle 2 tablespoons of sugar over ramekin. Using a kitchen blowtorch, caramelize the sugar by slowly sweeping back and forth over the surface of the yogurt. Let the sugar harden before serving.


Monday, June 16, 2014

8 Ways to Liven Up a Berry Salad

In celebration of SUMMER and SUN, I am bringing you a whole week's worth of berries! For me, there is nothing quite as pleasant as freshly picked berries, whether you picked them yourself or bought them from the farmer's market.

Today, I am bringing you 10 ways to improve your berry salad. Berry salads are a staple at my brunch and dessert tables, but after a while, I am ready for something new. These twists on the classic will entice all of your friends at your next dinner party.
  1. Add orange zest strips to your salad with this zester. You can see how beautiful it looks in the pictures above!
  2. Chop in a handful of fresh herbs, like mint or rosemary.
  3. Drizzle in a tablespoon or two of a flavored liqueur like Grand Marnier or Framboise.
  4. Macerate the berries in just a touch of vanilla sugar. It's perfect as a topping for shortcakes or pound cake. 
  5. Add a splash or two of balsamic vinegar...I promise, it's delicious!
  6. Crumble in some tangy goat cheese or feta cheese for a salty-sweet twist.
  7. Create a delicious pancake topping by throwing in a dash or two of cinnamon to your berries. 
  8. Squeeze in a lime or a lemon for a tangy taste!
Hope this inspires you to take some risks on your next berry salad. Let me know in the comments what's in your favorite berry salad!

Friday, June 13, 2014

Weekend Reading


I'm spending the weekend at home in sunny San Diego with family--my younger sister is graduating from high school! Hope you all have a relaxing weekend that includes a lot of fresh air and deliciously long brunches.

A big win for both consumers and POM, thanks to SCOTUS.

Why I love San Francisco: so much good ice cream.

Priceline looking to buy OpenTable, for $2.6B.

I need to get myself one of these iced lattes, stat.

My favorite burger spot, Shake Shack, celebrated its 10th anniversary this week! Check out their special anniversary burgers.

And, interviews with the Shake Shack CEO, Randy Garutti, and founder, Danny Meyer on why they will never let you put peanut butter on a Shack burger.

A DC classic gets a makeover.

I"m excited to check out this new Pixar animated short, Feast, which is coming out in November.

Image via Paris in Four Months

Wednesday, June 11, 2014

Hibiscus Mint Tea and Hibiscus Lillet Cocktail


During the summer, there is nothing more refreshing than iced tea. In the evenings, I reach for iced tea without caffeine, so I can actually get some sleep!

At Baked & Wired last week, I went out on a limb and tried the hibiscus mint iced tea instead of my typical iced coffee. Not only was the iced tea incredibly refreshing, it also seemed so easy to recreate at home. I would serve this at summer dinner parties all season long!

After trying out this iced tea, I spotted a hibiscus tea cocktail recipe from Bellocq. Considering that it was a cocktail with both hibiscus tea and my favorite aperetif, Lillet, I knew I also had to share this recipe.

Hibiscus Mint Tea

1 quart water
4 hibiscus tea bags
6 sprigs of washed fresh mint leaves

Bring the water to a boil on the stove, then add in tea and mint leaves. Let steep for at least 10 minutes. Let cool, then serve over ice. Garnish with fresh mint if desired. 

Hibiscus Lillet Cocktail

from Bellocq

3 parts hibiscus tea, cooled
1 part Lillet
Sugar, to taste

Combine ingredients in a large glass, then pour over ice and serve. 


Monday, June 9, 2014

Favorite Finds: Salty Road

Growing up, I had the BIGGEST sweet tooth. Any type of candy, I would eat it. As I grew older, I still kept my sweet tooth, but I became much pickier about the type of candy I eat. 

Since middle school or so, I have avoided salt water taffy. It once was a childhood favorite, but its artificial flavors and colors, in addition to its cloyingly sweet taste, made me pass over it time and time again. 

Salty Road taffy makes me want to eat salt water taffy again. This artisanal taffy company creates a chewy, addicting candy with just the right about of salty crunch and sweet flavors. How could you skip out on Bergamot taffy or Salted Mango Lassi taffy? Salty Road is a childhood favorite, meant for adult tastes. 


Their nostalgic packaging makes me smile--it's so bright and perfect for summer! Salty Road taffy makes a lovely gift for your summer barbecue hosts.  

You can find them at Dean & Delucas across the country, BiRite in San Francisco, and at Salt and Sundry in Washington DC. 


Friday, June 6, 2014

Weekend Reading


Happy Friday! I am spending the weekend visiting one of my oldest college friends, who now lives in Princeton. I am hoping for lots of time spent outside--she's promised me fruit picking, exploring the university, and some great outdoor art.

Hope you get a chance to relax and unwind from the week. Now that summer is basically here, I find myself relishing my weekends even more than I normally do.

Some weekend links...

Happy National Doughnut Day! This slideshow with some of the best doughnuts around the country will definitely leave you wanting a doughnut if you haven't had one today.

Ice cream + my favorite color scheme = these adorable bowls

I'm inspired by Jose Andres and the work he is doing in Haiti. He's one of my chefs, and quickly becoming one of my favorite philanthropists.

I've been following the New York Times's wine lessons because they are so approachable, even for people who know nothing about wine!  This month focuses on Riesling, and you can find the link here.

Currently coveting: tickets to see Ina Garten.

Adding this dulce de leche bar from Dandelion Chocolate to my SF pastry bucket list.

Maya Angelou, the chef.

Wednesday, June 4, 2014

Tabbouleh


June is by FAR my favorite month. Sunshine, fresh berries, beaches, bright nail polish colors, tank tops, ice cream, summer BBQs...I mean, what is there not to like? MOST importantly, June is also my birthday month! 

In honor of my favorite month and summer barbecues, I am going to be sharing my favorite summer entertaining recipes during the month of June. 

Tabbouleh,  a Middle Eastern staple, should really be a staple at your summer table. It is light and refreshing thanks to the abundance of parsley, mint, and lemon juice! This is a true herb salad, filled with lots of market fresh produce. It is perfect side dish to grilled meats or as an appetizer option during cocktails. 

This recipe for tabbouleh comes from the cookbook Jerusalem by Yotam Ottelenghi and Sami Tamimi. It is not hard to see why this cookbook quickly rose to success. Combining their Jewish (Ottelenghi) and Arab (Tamimi) backgrounds with the love of their hometown (Jerusalem), Ottelenghi and Tamimi beautifully demonstrate how to make delicious Middle Eastern dishes, both familiar and exotic. 

This cookbook is one I am going to reach for in the years to come, not only for its tasty recipes, but also for the wonderful stories about Jerusalem. Jerusalem is such a unique and vibrant city given its rich history and importance to three of the world's religions. In just a few hundred pages, Jerusalem manages to capture the energy and spirit of this wonderful city. 

Tabbouleh

from Jerusalem

1/3 cup fine bulgur wheat
2 large tomatoes, ripe but firm
1 shallot, finely chopped
3 tablespoon freshly squeezed lemon juice, plus a little extra to finish
4 large bunches flat-leaf parsley
2 bunches mint
2 teaspoon ground allspice
1 teaspoon baharat spice mix
1/3 cup olive oil
Salt and freshly ground pepper

If you cannot find fine bulgur wheat or if you do not know what grade bulgur wheat you have, then soak the wheat in boiling water for 5 minutes. Drain the bulgur, and then leave it to dry in a fine sieve.

Put the bulgur in a fine sieve and run under cold water until the water rinsing through looks clear. Transfer to a large mixing bow.

Using a small serrated knife, cut the tomatoes into slices 1/4 inch thick. Cut each slice in 1/4 inch strips, and then into dices. Add the tomatoes and their juices to the bowl, along with the shallot and lemon juice. Stir well.


Take a few sprigs of parsley and pack them together tightly. Use a large, very sharp knife to trim off most of the stems and discard. Use the knife to move up the stems and leaves, gradually "feeding" the knife in order to shred the parsley as finely as you can. Try to avoid cutting pieces wider than 1/32 inch. Add to the pick.

Pick the mint leaves off the stems, pack a few together tightly, and shred them finely as you did the parsley. Add to the bowl.

Finally, add the allspice, baharat, olive oil, and some salt and pepper. Taste and add more salt, pepper, and lemon juice if you like. 


design + development by kelly christine studio