Mixpanel

 photo HilaryStoneSoupHeader-ABOUT.png photo HilaryStoneSoupHeader-RECIPES.png photo HilaryStoneSoupHeader-TRAVELGUIDES.png photo HilaryStoneSoupHeader-ESSENTIALS.png photo HilaryStoneSoupHeader-CONTACT.png
Showing posts with label baked good. Show all posts

Monday, October 26, 2015

Double Chocolate Banana Bread

Double Chocolate Banana Bread
This week, I'm sharing two loaf cakes that belong on your Halloween dessert table. Today's recipe is a dark as night chocolate banana bread studded with chocolate chips.

For Z's birthday, we stocked up on bananas for toast, and as per usual, we were left with a plethora  of bananas. We bought four times as many bananas as we needed! Instead of letting the bananas go to waste, we froze half, and then put the rest into banana breads. 

Z is big fan of banana bread and chocolate chips, and as soon as I saw this double chocolate banana bread recipe, I knew we had to give it a try. I love how dark the bread turns out, plus the surprising banana flavor. 

Double Chocolate Banana Bread

I baked the chocolate banana bread on a Sunday, with hopes of bringing leftovers into work, but it was so delicious that we devoured the whole loaf that day! It's crazy good. 

Loaf cakes like banana bread make perfect fall treats--they pair great with an afternoon cup of tea, and I love eating them warm out of the oven on a cold day. Oh, and did I mention there's no fancy equipment required, and the prep process takes less than 5 minutes? Another reason to add this into your baking rotation.

 On Wednesday, I'll share another loaf cake that is perfect for Halloween--hint: it's orange and black!


Other recipes you would like:

Double Chocolate Banana Bread

From Smitten Kitchen

3 medium or large very ripe bananas
1/2 cup butter, melted
3/4 cup brown sugar
1 large egg
1 teaspoon pure vanilla extract
1 teaspoon baking soda
1/4 teaspoon table salt
1 cup all purpose flour
1/2 cup Dutch processed cocoa powder
1 cup semisweet or bittersweet chocolate chips

Heat oven to 350 degrees F. Spray a 9x5 inch loaf pan with nonstick cooking spray.

Mash bananas in bottom of large bowl. Whisk in butter, then brown sugar, eggs, and vanilla. Place baking soda, salt, flour, and cocoa powder into a sifter, and sift over wet ingredients. Stir ingredients together, and then fold in chocolate chips.

Double Chocolate Banana Bread


Pour into prepared pan and bake for 55 to 65 minutes, until toothpick inserted into the center of the cake comes out batter free. Let cool in pan for 10 to 15 minutes. Then run a knife around pan, and invert the cake onto a cooling rack. Move the cake right side up. Serve warm (my favorite) or at room temperature.

Wednesday, July 22, 2015

Best Blueberry Muffins

Best Blueberry Muffins

There are so many reasons to make these blueberry muffins. So many reasons that you should stop off at the grocery store on your way home from work this Friday to buy buttermilk, blueberries, and whatever else you need. Add some good coffee beans into your shopping cart while you are at it. So many reasons that you should wake up a little bit earlier than you typically do to put these in the oven and surprise your loved ones. Make some coffee with those good coffee beans, and then start making the batter.

Best Blueberry MuffinsBest Blueberry Muffins

These blueberry muffins are packed with berry flavor, unlike most that are just cloyingly sweet. The geniuses at Cook's Illustrated tested this recipe over and over again to make sure it was perfect. If you follow the recipe, they'll come out absolutely stunning. Plus, they don't take very long to make, which means you have absolutely no excuse to not whip them up this weekend.

Best Blueberry Muffins

Bring them to a friend's brunch. Cheer up a sick friend with a basket of blueberry muffins. Or just enjoy them in the bright morning sun. Bonus points if you griddle your muffin halves in some extra butter to create a delicious crust.

Best Blueberry Muffins

Best Blueberry Muffins

from Cook's Illustrated

2 cups fresh blueberries
1 1/8 cups sugar plus 1 teaspoon
2 1/2 cups all-purpose flour
2 1/2 teaspoons baking soda
1 teaspoon table salt
2 large eggs
4 tablespoons unsalted butter, melted and cooled
1/4 cup vegetable oil
1 cup buttermilk
1 1/2 teaspoons vanilla extract

Adjust oven rack to upper middle position, and heat oven to 425 degrees. Spray standard muffin tin with nonstick spray. 

Bring 1 cup blueberries and 1 teaspoon sugar to simmer in small saucepan over medium heat. Cook, mashing berries with spoon several times and stirring frequently, until berries have broken down and mixture has reduced to 1/4 cup. Transfer to small bowl and cool to room temperature. 

Best Blueberry Muffins

Whisk flour, baking soda, and salt together in a large bowl. Whisk sugar and eggs together into a medium bowl until homogenous, about 45 seconds. Slowly whisk in butter and oil to sugar/egg mixture. Whisk in buttermilk and vanilla as well. 

Slowly fold in liquids and remaining blueberries into dry ingredients with a spatula. Don't overmix! Batter should be lumpy. 

IMG_0788

Use ice cream scoop or large spoon to evenly distribute batter to muffin tin. The batter should completely fill the cups. Spoon 1 teaspoon of cooked berry mixture over each muffin. Using a chopstick, toothpick, or skewer, swirl the berry mixture in a figure-eight motion into the batter. 

Best Blueberry Muffins
Bake until muffins are golden and firm, about 17-19 minutes. Rotate the muffin tin halfway through. Let cool in tin for 5 minutes. 

To griddle in butter, cut muffin in half. Place a tablespoon of butter in a pan, and heat over medium heat. When butter starts to foam, add muffin, cut side down. Let cook until golden and crispy. 


Thursday, February 19, 2015

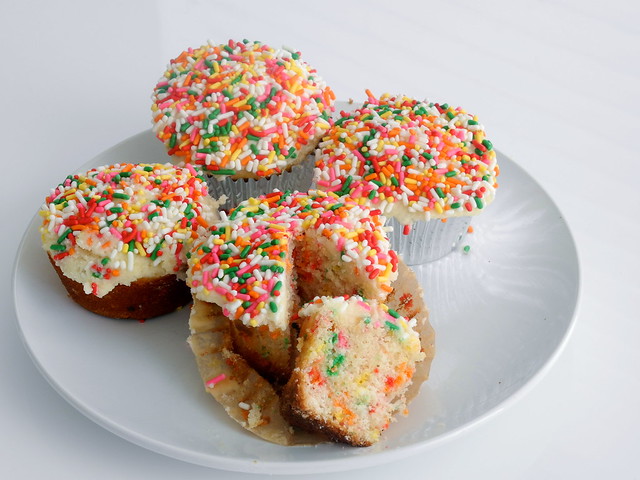
Easy Funfetti Cupcakes

Easy Funfetti Birthday CupcakesEasy Funfetti Birthday Cupcakes Important Question of the Day: Team Cake or Team Cupcake?

To be honest, my allegiance switches back and forth between the two. When I'm out at a restaurant or bakery, I almost always opt for cake. The frosting to cake ratio is slightly higher, which I love. But forget about making a cake at home. Cakes always intimidate me! I'm firmly in Team Cupcake when it comes to baking at home.

One of my friends recently celebrated his birthday with a potluck dinner, and I think no birthday celebration is complete without cake. And the more sprinkles on this cake, the better.

Cupcakes are easy to make at home for a birthday or celebration. They don't take too long to bake, making them even possible on a weeknight. They look great rolled in chopped nuts or sprinkles, so there's no need for the frosting to look perfect.

This funfetti cupcake recipe is perfect for celebrating the birthdays of all the kids (and kids at heart) in your life. These cupcakes appeal to both kids and adults, leaving everyone wanting another.

In case you are looking for an easy chocolate cupcake recipes, check out my other birthday inspired post here.

Easy Funfetti Birthday Cupcakes

Easy Funfetti Cupcakes

Inspired by Cook's Country

3 cups plain cake flour
1 teaspoon baking powder
1/2 teaspoon baking soda
1 teaspoon table salt
4 large eggs, at room temperature
2 teaspoons vanilla extract
1 1/3 cups sugar
12 tablespoons butter, melted and slightly cooled
1 1/4 cups buttermilk
3/4 cups sprinkles, chopped

Frosting:
1 1/2 cups butter at room temperature
3 cups confectioners' sugar
2 tablespoons of milk
2 teaspoons vanilla extract
1/8 teaspoon salt
1 1/2 cups rainbow sprinkles

Adjust oven rack to middle position and pre-heat oven to 325 degrees. Line 2 standard muffin tins with paper or foil cupcake liners.

Whisk flour, baking soda, and salt in a medium bowl until combined. Whisk eggs and vanilla in large bowl until well blended.

In steady stream, pour sugar into eggs, whisking constantly. Gradually whisk in melted butter, then add buttermilk. Add one-third of dry ingredients to bowl with wet ingredients. Using whisk, gently combine; a few streaks of flour should remain. 

Repeat twice with remaining dry ingredients. Add sprinkles. Continue to stir gently with whisk until most lumps are gone. Do not overmix. 

Fill cupcake liners about two-thirds full. Bake, with tins side by side on middle rack, until cupcakes just begin to color and toothpick inserted into center comes out clean, 18 to 22 minutes. Cool pans on wire racks for 5 minutes, then remove cupcakes from pans, place back on rack, and cool to room temperature before frosting. 

For Frosting:

Using electric mixer, beat butter in large bowl until fluffy, about 30 seconds. With mixer on low speed, add sugar, 1 cup at a time, and mix to combine. Increase speed to high and beat until pale and fluffy, about 1 minute.

Reduce speed to medium-low and add milk, vanilla, and salt. Increase speed to high and beat until fluffy, about 30 more seconds.

To Frost Cupcakes:

Place sprinkles into a bowl. Spoon a couple of tablespoons of frosting on top of cupcake, and then use an offset spatula (or knife) to smooth out frosting all over cupcake. Roll cupcake in sprinkles.

Repeat for all of the cupcakes!

Sing happy birthday!

Enjoy!
Easy Funfetti Birthday Cupcakes

Wednesday, November 5, 2014

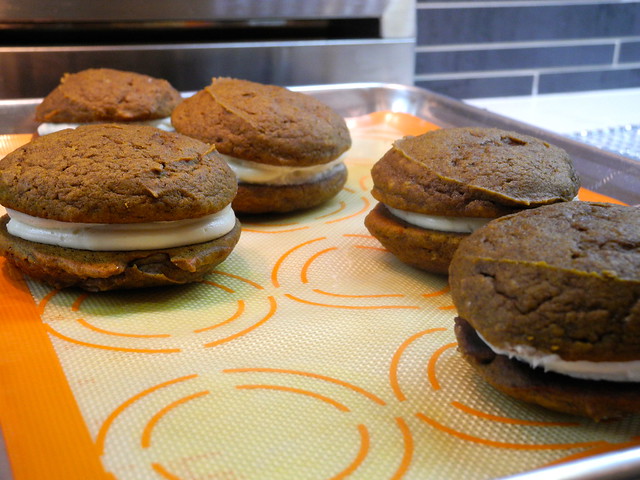
Pumpkin Whoopie Pies

Pumpkin Whoopie Pie Recipe
You should make these pumpkin spice whoopie pies because they will make your kitchen smell AMAZING. Yes, they are delicious. Yes, they are relatively easy to make. Yes, your friends will love them. But really, the best reason to make them is because your kitchen will smell perfectly like fall with a mixture of pumpkin, ginger, cloves, and cinnamon.

Pumpkin Whoopie Pie Recipe
With some cooler weather finally making its way to the Bay, it feels like fall. And fall typically means an overload of pumpkin spice products--lattes, candles, room scents, caramels, etc.

I typically pass on about 90% of pumpkin spice paraphernalia. It's just not my thing. However, pumpkin spice cake is something I never ever turn down. 

I really like my pumpkin spice cake recipe--it's easy and most importantly, super delicious. It's my go-to pumpkin spice "it's finally fall!" recipe. 

And then, I ran across a pumpkin whoopie pie recipe from Baked Bakery in NYC, and I realized I might have to experiment with a new pumpkin spice recipe this year.

Thank goodness I tried these whoopie pies out. My kitchen smelled amazing and the pies tasted even better.

Pumpkin Whoopie Pies

Makes approximately 12 pies
From Baked NYC

For the Pumpkin Whoopie Cookies:
cups all-purpose flour
1 teaspoon salt
1 teaspoon baking soda
1 teaspoon baking powder
2 tablespoons ground cinnamon
1 tablespoon ground ginger
1 tablespoon ground cloves
2 cups firmly packed dark brown sugar
1 cup vegetable oil
3 cups pumpkin puree, chilled
2 large eggs
1 teaspoon pure vanilla extract

For the Cream-Cheese Filling:
3 cups confectioners' sugar
1 stick unsalted butter, room temperature
8 ounces cream cheese, softened
1 teaspoon pure vanilla extract

Preheat the oven to 350 degrees. Line two cookie sheets with parchment paper or nonstick baking mats.

In a large bowl, whisk together the flour, salt, baking soda, baking powder, cinnamon, ginger, and cloves. 

In another large bowl, mix together the brown sugar and oil. Stir in the pumpkin puree and whisk until combined. Stir in the eggs and vanilla, and whisk until combined. 
Pumpkin Whoopie Pie Recipe

Sprinkle the flour mixture over the pumpkin mixture, and whisk until combined.

Using an ice cream scoop with a release mechanism, scoop out cookies onto cookie sheets. Bake cookies until they are just starting to crack on top (a toothpick inserted into the center of the cookie should come out clean), about 15 minutes. Remove the cookie sheets from the oven and let them cool on the pans.
Pumpkin Whoopie Pie Recipe
Meanwhile, sift the confectioners' sugar. Beat the butter with an electric mixer until light and fluffy. Add in the cream cheese and beat again until light and fluffy.  Add the confectioners' sugar and vanilla and beat until well combined.

Transfer filling to a pastry bag. Pipe a large dollop of frosting onto half of the cookies. Top the frosted cookies with another cookie, pressing down to allow the frosting to spread to the edges. 
Pumpkin Whoopie Pie Recipe
Pumpkin Whoopie Pie RecipePumpkin Whoopie Pie Recipe
Refrigerate for 30 minutes. 

Enjoy!
Pumpkin Whoopie Pie Recipe

Monday, June 23, 2014

Classic Devil's Food Cupcakes with Vanilla Buttercream Frosting

Buttermilk Devil's Food Cake

Today's my birthday which is making this Monday pretty wonderful! Though I am sad I can no longer claim "22" as my song (okay, mine and about 30,000 other people's "song"), I am excited for new adventures over the upcoming year. This year's goal: working my happiness like it's a full time job.

Of course, every birthday has to include cake. One my personal favorites is this devil's food cake recipe from the Cake Mix Doctor. Yes, it includes cooking from a cake mix BUT the results are amazing. The cake mix means it's easy to put these together, but the buttermilk and extra cocoa powder lend an intense flavor. 

These are perfect for any one's birthday, or really any celebratory event!

Devil's Food Cupcakes with Vanilla Buttercream Frosting

1 package (18.25 ounces) plain devil's food cake mix
3 tablespoons unsweeted cocoa powder
1 1/3 cups buttermilk
1/2 cup vegetable oil, such as canola, corn, safflower, soybean, or sunflower
3 large eggs
3 teaspoons pure vanilla extract
1 stick butter, at room temperature
3 cups confectioners sugar, sifted
3-4 tablespoons whole milk

Place a rack in the center of the oven and preheat the oven to 350 degrees F. Put cupcake liners in a cupcake pan. Set aside.

Buttermilk Devil's Food CakePlace the cake mix, cocoa powder, buttermilk, oil, eggs, and one teaspoon of vanilla in a large mixing bowl. Blend with an electric mixer on low speed for 1 minute. Stop the machine and scrape down the sides of the bowl with a rubber spatula. Increase the mixer speed to medium and beat 3 minutes more, scraping down the sides again if necessary. The batter should look well blended.

Buttermilk Devil's Food Cake

Divide the batter into the cupcake pan. Bake until the cupcakes spring back when lightly pressed with your finger and just start to pull away from the sides of the pan (about 15-20 minutes). Remove the pan from the oven and place it on a wire rack to cool for 10 minutes. Remove the cupcakes from the pan and let cool completely. 

Buttermilk Devil's Food Cake

For the frosting: Place the butter in a large mixing bowl. Blend with an electric mixer on low speed until fluffy, 30 seconds. Stop the machine and add the confectioners' sugar, two teaspoons of vanilla, and 3 tablespoons of milk. Blend with the mixer on low speed until the sugar is incorporated. Increase the speed to medium and beat until light and fluffy. Blend in up to one tablespoon milk if the frosting seems to stiff.

Buttermilk Devil's Food Cake

Decorate cupcakes accordingly!

Buttermilk Devil's Food Cake

Friday, May 16, 2014

French Yogurt Cake

I've always had an obsession with tea parties. I love the frilly lace tablecloths, the delicate vintage teacups, and the dainty sugar cubes that I add to my Assam tea.

Lately, I've been dreaming of hosting a tea party for friends to celebrate spring. Unfortunately, my house is not that accommodating for tea parties--we don't have very much common space. 

However, this French yogurt cake would be at the top of my list of things to serve at a spring tea party. It is very similar to a pound cake, but instead of butter it uses greek yogurt. The result is a delicious, light cake that would go impeccably well with a cup of tea. 

To make the cake even more festive, top with fresh fruit!

French Yogurt Cake

From Bon Appétit

Nonstick vegetable oil spray
1 1/2 cups all purpose flour, plus more for dusting
2 teaspoons baking powder
3/4 teaspoon kosher salt
1 cup sugar
1 tablespoon finely grated lemon zest
3/4 cup whole-milk Greek yogurt
1/2 cup vegetable oil
2 large eggs
1/2 teaspoon vanilla extract

Preheat oven to 350 degrees. Coat pan with vegetable oil spray. Dust pan with flour; tap out excess.

Whisk 1 1/2 cups flour, baking powder, and salt in a medium bowl. 

Using your fingers, rub sugar with lemon zest in a large bowl until sugar is moist. Add yogurt, oil, eggs, and vanilla extract; whisk to blend. Fold in dry ingredients just to blend. 

Pour batter into prepared pan, and then smooth the top of the batter. Bake until top is golden brown and a tester inserted into the middle comes out clean, 50-55 minutes. 

Let pan cool on a wire rack for 15 minutes. Invert onto rack to cool completely.


Friday, April 4, 2014

The Best Banana Bread

DSCN1038Due to the abundance of snow days DC had this winter, I got pretty good at making banana bread. The snow has me longing for warm, tropical island vacations to places like Hawaii. Though I probably will not be going to Hawaii any time soon, this banana bread, with its slightly crispy exterior, will have to do instead.

While sitting at home working on financial models or Powerpoint slides, this bread would be baking in the oven, and my mind would drift to white sand beaches, green luscious hiking trails, and lots and lots of sunshine. This recipe is perfect for those tropical daydreams, since it hails from Maui.

Julia's Best Banana Bread


From Bon Appetit Magazine

Nonstick vegetable oil spray
1 3/4 cup all purpose flour
1 1/2 teaspoon baking soda
3/4 teaspoon kosher salt
3 large eggs
1 1/2 cups sugar
1 cup mashed ripe bananas
3/4 cup vegetable oil

Preheat oven to 350 degrees F. Coat a 9x5x3" loaf pan with nonstick spray. Whisk flour, baking soda, and salt in a medium bowl.
Banana breadCombine eggs, sugar, banana, and oil together in a large bowl until smooth.
Banana breadAdd dry ingredients to banana mixture and stir until just combined. Scrape batter into prepared pan and smooth  the top of the batter.
Banana breadBake until a wooden toothpick inserted into the middle of the loaf pan comes out clean, 60-70 minutes. Transfer to a wire rack. Let bread cool in pan for 15 minutes. Run a knife around the inside of the pan. Turn the bread onto the rack and let it cool completely.
Banana bread


Friday, March 7, 2014

Olive Oil Cake

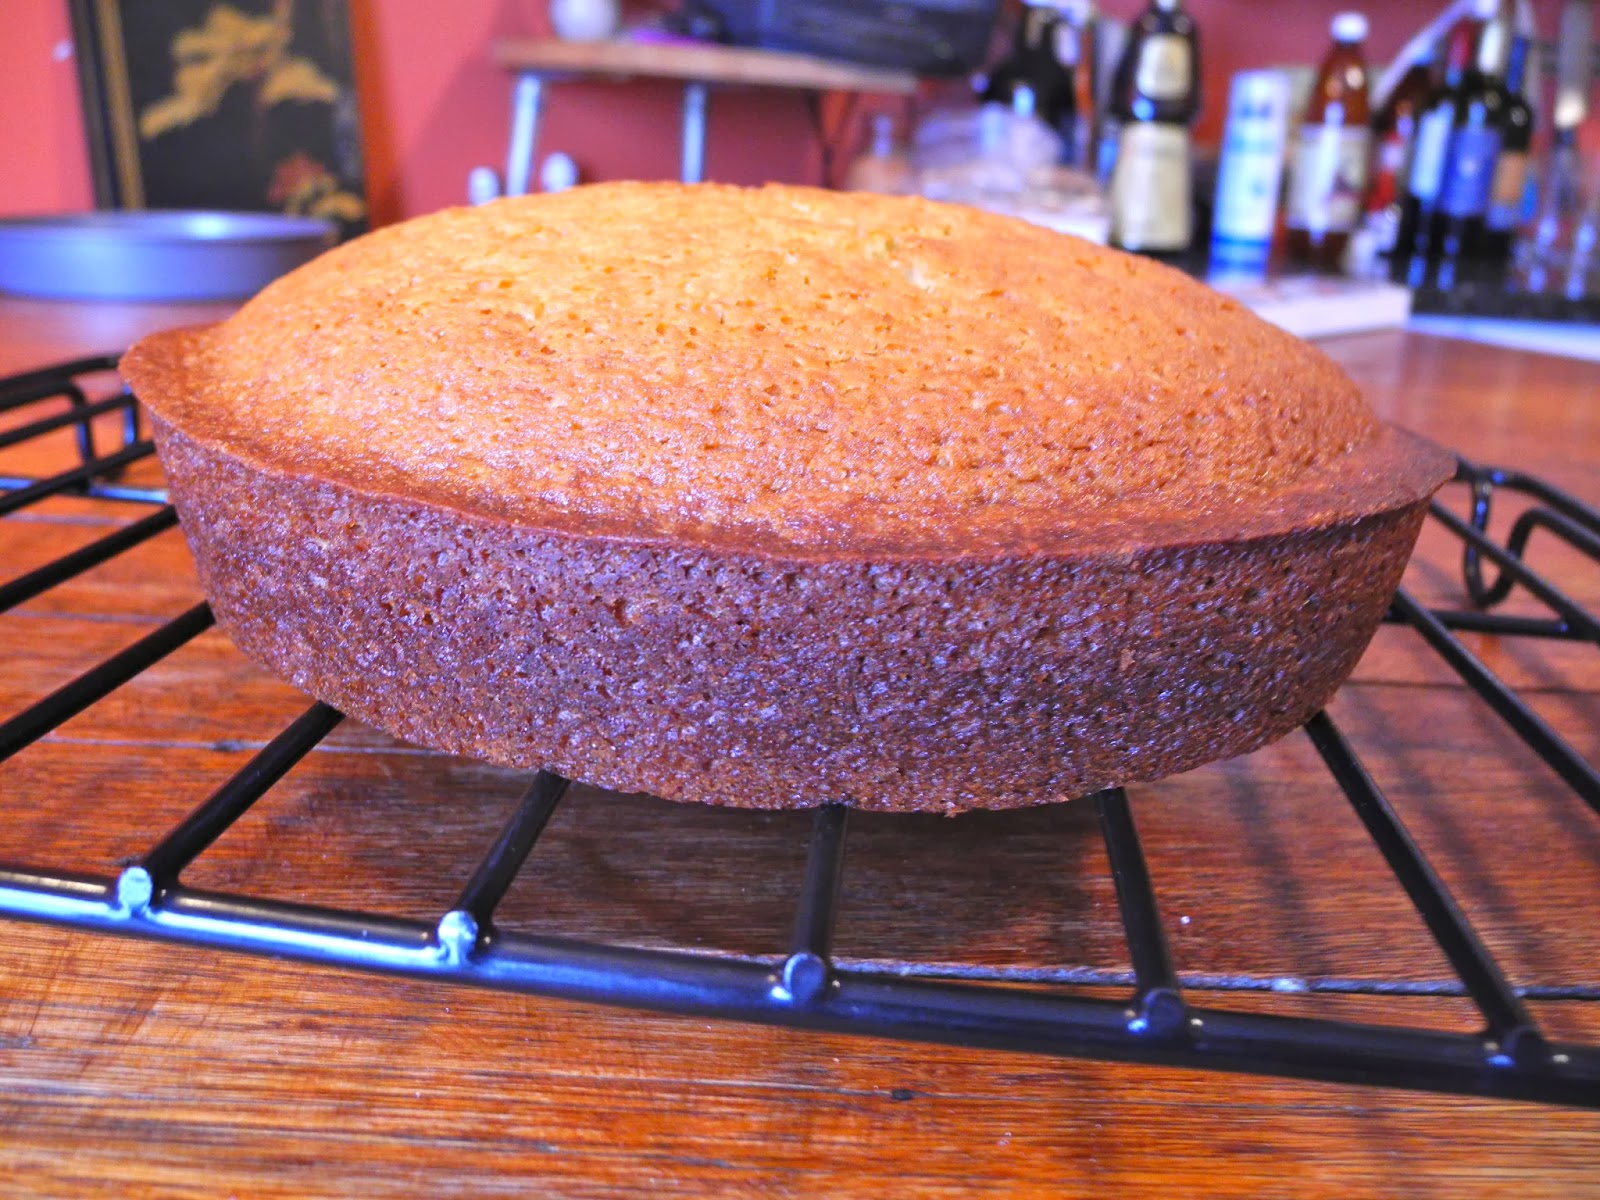
As soon as I saw this cake recipe, I felt an instinctive "yes." This is a recipe that draws you in, like a fresh cup of tea on a dreary afternoon. I know olive oil sounds unattractive in a cake, but it ensures the cake is super moist, yet has a superb crispy crust. Instead of tasting olive oil, you tasted a bright orange flavor from orange zest, orange juice, and Grand Marnier.

Even more importantly, I love the simplicity of this cake--you probably have most of these ingredients on hand already. Honestly, the most difficult step is grating the orange for orange zest (more instructions here). After that, it is a pretty simple dump, mix, and bake recipe. 

This weekend, invite some old friends over for tea. You know, the ones you always promise to see, but never actually do. Bake this cake, ideally right before they come over, so your house has a wonderfully sweet orange smell before they arrive. Brew a pot of tea, devour this cake, and enjoy the lovely afternoon catching up with friends. 

Olive Oil Cake

From Food 52

2 cups all-purpose flour
1 3/4 cup sugar
1 1/2 teaspoon kosher salt
1/2 teaspoon baking powder
1/2 teaspoon baking soda
1 1/3 cup extra-virgin olive oil
1 1/4 cup whole milk
3 large eggs
1 1/2 tablespoon grated orange zest
1/4 cup fresh orange juice
1/4 cup Grand Marnier

Heat the oven to 350 degrees. Spray a 9-inch cake pan (make sure the pan is at least two inches deep), and cover the bottom of the pan with parchment paper. In a bowl, whisk together the flour, sugar, salt, baking powder, and baking soda. 
In another bowl, mix together the oil, milk, eggs, zest, orange juice, and Grand Marnier. Add the dry ingredients to the wet ingredients. Mix until just combined. Pour the batter into the prepared pan and bake for 1 hour, until the top is golden.  A toothpick inserted into the middle of the cake comes out clean. 
Transfer the cake to a rack, and let it cool for 30 minutes. 
Run a knife around the edge of the pan, invert the cake onto the rack, and let it cool completely.
 

design + development by kelly christine studio