Mixpanel

 photo HilaryStoneSoupHeader-ABOUT.png photo HilaryStoneSoupHeader-RECIPES.png photo HilaryStoneSoupHeader-TRAVELGUIDES.png photo HilaryStoneSoupHeader-ESSENTIALS.png photo HilaryStoneSoupHeader-CONTACT.png
Showing posts with label basics. Show all posts

Wednesday, October 7, 2015

Back to Basics: Roasted Garlic

Roasted Garlic Recipe
I love garlic. Garlic bread, chicken with 40 cloves of garlic, pasta with sliced garlic, garlic green beans, garlic hummus--as long as it's on the savory side, I'm a fan of throwing a few garlic cloves into it. Z, on the other hand, claims to dislike garlic. I'm keeping my fingers crossed that this will change at any given moment, because how could you NOT like garlic, but anyways, it means my food life is often garlic deprived.

Luckily, we had a few extra heads of garlic around the other day and lots of bread, which gave me the perfect excuse to create a batch of roasted garlic. Roasted garlic is more mellow and sweet than raw garlic, and it has this awesome creamy texture with caramelized edges. It's garlic for grown ups. 

Roasted garlic is my favorite as is on top of really good bread. It's a great low calorie alternative to butter! The options don't stop there though. Whisk it into a salad dressing, use it as a spread, throw it into mashed potatoes.--it'll give a flavor boost to anything you add it to.

Roasted Garlic Recipe
This is a nearly foolproof recipe, so there's no excuse for not making some roasted garlic this weekend. 

Roasted Garlic


1 head of garlic
Drizzle of olive oil

Preheat oven to 400 degrees. Chop the top off of the garlic, so that the cloves are exposed. Try to remove a little bit of the white skin, while keeping the head of garlic intact. Lay a piece of foil on a baking sheet, and place the garlic on top. Drizzle the garlic head with olive oil, then wrap the head up in the foil. 

Roasted Garlic Recipe

Bake in the oven until cloves are caramel in color and tender, about 30 minutes. 

Tuesday, February 17, 2015

Back to Basics: Buttermilk Pancakes

Basic Pancake Recipe I'm firmly a morning person. I grew up with a dad that spoiled me forever with delicious homey weekend breakfasts--biscuits, oatmeal, scrambled eggs...the whole (breakfast) enchilada. I never grew up sleeping in on weekends, and even to this day I have a hard time sleeping in past 8am.

A few weekends ago, I woke up on the earlier side, and all I wanted to do was fall back asleep. I laid in bed for about an hour, willing myself to go back to sleep. I eventually gave up,  made a big cup of coffee, and started breakfast. Good thing Z's in charge of the dishes.

Last weekend, all I wanted for breakfast were classic buttermilk pancakes. This basic pancake recipe is a classic--it is simple and easy to make, but sure to impress your friends at brunch!

Basic buttermilk pancakes are really just a canvas for all the delicious things you can add to them--we added bananas and chocolate chips per Z's request, but I really love blueberries in my pancakes when they are in season.

Enjoy!

Basic Pancake Recipe Basic Buttermilk Pancake Recipe

From Martha Stewart

2 cups all-purpose flour
2 teaspoons baking powder
1 teaspoon baking soda
1/2 teaspoon salt
3 tablespoons sugar
2 large eggs, lightly beaten
3 cups buttermilk
6 tablespoons of butter, melted and divided

Preheat the griddle to 375 degrees.

Whisk together the flour, baking powder, baking soda, salt, and sugar in a bowl. Add eggs, buttermilk, and 4 tablespoons of butter. Make sure not to overbeat it--the secret here is to have lumps!

Brush butter onto the griddle.

Using a large ladle, spoon out approximately 1/2 cup of batter into a circle on the griddle. Repeat until the griddle is full, with pancakes about 2 inches apart. This is the time to scatter berries, bananas, chocolate chips, etc!

When pancakes have bubbles on top and are slightly dry around edges, flip over. Cook until golden brown, about 1 minute.

Repeat with remaining batter. Serve pancakes warm with butter and syrup.

Monday, February 9, 2015

Back to Basics: Chocolate Pudding

Hilary Stone Soup: Chocolate Pudding Hilary Stone Soup: Chocolate Pudding Last week, I gave you lots of Valentine's Day posts (see gift guides 1 and 2, plus this amazing dinner recipe). In my mind, Valentine's Day isn't Valentine's Day without a really great chocolate dessert.

I love rich over the top dinners. They remind me of special dinners out with my family. Dinners where we would have to dress up, the waiter would bring us kids Shirley Temples to drink, and there was no real children's menu. These meals always ended with dessert--typically a rich, traditional dessert like chocolate mousse, creme brulee, or chocolate molten cake.

Hilary Stone Soup: Chocolate Pudding
I recently went out to dinner at Chapeau! (the exclamation is their doing, not mine), and had an absolutely fabulous meal. Of course it ended with dessert, and while I loved my chocolate cake, I was unable to even eat half of it.

That's when I knew I made it. I was an adult. I already felt as if I needed to spend every night that coming week at Soul Cycle, and I knew that if I finished the dense and rich chocolate cake in front of me, I might need two straight weeks at Soul Cycle.

Luckily this chocolate pudding delivers in the great chocolate dessert department without making you feel as if your date needs to roll you home. Chocolate desserts, definitely sexy and Valentine's Day appropriate. Chocolate desserts that leave you in a sugar coma, definitely not sexy.

Hilary Stone Soup: Chocolate Pudding

This pudding has tons of chocolate flavor (thanks to 6 oz of chopped chocolate) and is the grown-up version of the chocolate pudding you loved growing up.

In some ways, it's pure nostalgia. It's an American pudding without eggs or cream--similar to the pudding that comes in that little box. It's adult chocolate flavor though is outrageous, in the best way possible. I added a dollop of whipped cream and a sprinkling of flaky sea salt, just to balance out the chocolate.

The best part: it looks so cute served in individual ramekins, and you can make it in advance. The pudding has to be made 2-3 hours ahead of time so it can set in the fridge, and you can even leave the puddings in the fridge for 3 days.

This is what you want to make for dessert this Valentine's Day. Enjoy!

Chocolate Pudding

Adapted from John Sharffenberger via Smitten Kitchen

1/4 cup cornstarch
1/2 cup sugar
1/8 teaspoon salt
3 cups whole milk
6 ounces chopped semi- or bittersweet chocolate
1 teaspoon pure vanilla extract

Combine cornstarch, sugar, and salt in a medium saucepan. Slowly whisk in whole milk to prevent lumps, then add milk more quickly. 

Place over medium-low heat and stir occasionally, scraping the bottom and the sides. Use a whisk if lumps form. After 10 minutes or so, before the milk mixture simmers, the mixture should thicken and cover the back of a wooden spoon. Add the chocolate and stir for another 2 to 4 minutes, until the mixture is fully incorporated and the pudding is thick.

Remove from heat and stir in the vanilla.

Either pour into one large serving bowl or divvy out into individual servings. Chill until the pudding is set, about 2 to 3 hours.

If you dislike pudding skin, put some plastic wrap over the pudding and smooth it gently into the surface of the pudding before refrigerating.


Tuesday, October 7, 2014

Back to Basics: Caramelized Onions

How to Cook Caramelized Onions
Despite Z's aversion to onions, and particularly caramelized onions, I managed to make one batch of frittatas this weekend chock full of caramelized onions and goat cheese.

Caramelized onions do take some patience, but the results are spectacular. Deeply flavorful, these onions you can toss them into salads or egg scrambles, spread them onto your sandwiches and burgers, and even add them to your cheese plates.

I'll be back later this afternoon to show you how you can turn these caramelized onions into delicious frittatas!

Caramelized Onions

1 tablespoon butter
1 tablespoon oil
2 large onions, sliced (slices should be no smaller than 1/8th of an inch)
3/4 cup deglazing liquid of choice (red/white wine, chicken/beef stock, water)

In a 12-inch pan over medium heat, add the butter and oil. Once the butter melts, lower the heat to medium low. Add in the onions.

For the next 45 minutes, let the onions cook. They will wilt down and get darker in color. Try not to stir the onions.

Once the onions are deep brown and soft,  remove them from the pan. Turn the heat in the pan up to medium. Add in the deglazing liquid, and using a plastic spatula, try to scrape all of the brown caramelized leftovers up from the bottom of the pan.

Once the liquid has been significantly reduced, pour the contents of the pan over the onions. Stir to incorporate. 

Thursday, August 14, 2014

Back to Basics: Buttermilk Biscuits

DSCN2415
When you're in the midst of packing, have no internet (thank you Comcast!), and are fighting general exhaustion from work, you should make biscuits. Biscuits will make everything better. 

At least, it did for me.

I decided in the midst of madness to whip up some biscuits using the last of my buttermilk. Looking back, I was really homesick, and warm, buttery drop biscuits with jam instantly brings me back to my kitchen table in San Diego. 

These buttermilk biscuits were incredibly simple, ready in under a half hour, and made my kitchen smell AMAZING. Drop biscuits are one of my favorites because they do not have to look perfect! I love their rustic look.

The Stone family likes these biscuits for breakfast, topped with more butter, jam, or honey. You could easily turn them into an awesome breakfast sandwich with some scrambled eggs. Of course, they make a great side dish for dinner too!

Buttermilk Drop Biscuits

From Cook's Illustrated

2 cups all purpose flour
2 teaspoons baking powder
1/2 teaspoon baking soda
1 teaspoon sugar
3/4 teaspoon table salt
1 cup buttermilk (make sure it's cold!)
8 tablespoons butter, melted and cooled slightly, plus 2 tablespoons melted butter

Make sure your oven rack is set to the middle position. Heat the oven to 475 degrees. 

Whisk flour, baking powder, baking soda, sugar, and salt in a large bowl. Combine buttermilk and 8 tablespoons of melted butter in a medium bowl, until small clumps form. 

DSCN2406

Add the buttermilk mixture to the dry ingredients, and stir with a rubber spatula until the mixture is just incorporated. 

Using a greased 1/4 cup measure, scoop batter onto a parchment-lined baking sheet. Space biscuits about 1 1/2 inches apart. 

DSCN2409Bake until the biscuit tops are golden brown and crisp, about 12-14 minutes. Brush biscuits with remaining melted butter. Transfer to a wire rack and cool for 5 minutes before serving.

DSCN2410
DSCN2416
DSCN2417


Friday, May 30, 2014

Back to Basics: Whipped Cream


Happy Friday! Even though this week was a short work week, I cannot wait for the weekend. Top of my to-do list: catching up on sleep, visiting the Farmer's Market, and working on this blog! I have lots of big changes in the works!

This whipped cream recipe is a necessity, a true basics recipe. It's creamy and slightly sweet, with a just a hint of vanilla. It's the perfect complement for both a rich, dark flourless chocolate cake and a bowl of vanilla ice cream.

Homemade whipped cream elevates the store-bought berry pie you raced to get before your friend's BBQ, and the whipped cream makes them think you are SO on top of your game. If you are awesome made your own pie, or cake, why ruin it with Cool Whip that always manages to leave a waxy film in your mouth?

My favorite way to eat whipped cream, though, is atop a fresh bowl of berries. There is no better way to end a summer meal!

Whipped Cream

1 cup heavy cream
1 tablespoon sugar
1 teaspoon pure vanilla extract

Fifteen minutes ahead of time, place your metal bowl and metal whisks into the freezer.

Place the sugar and vanilla in the mixing bowl, then add the whipping cream. Whisk just until the cream reaches stiff peaks. 


Wednesday, May 21, 2014

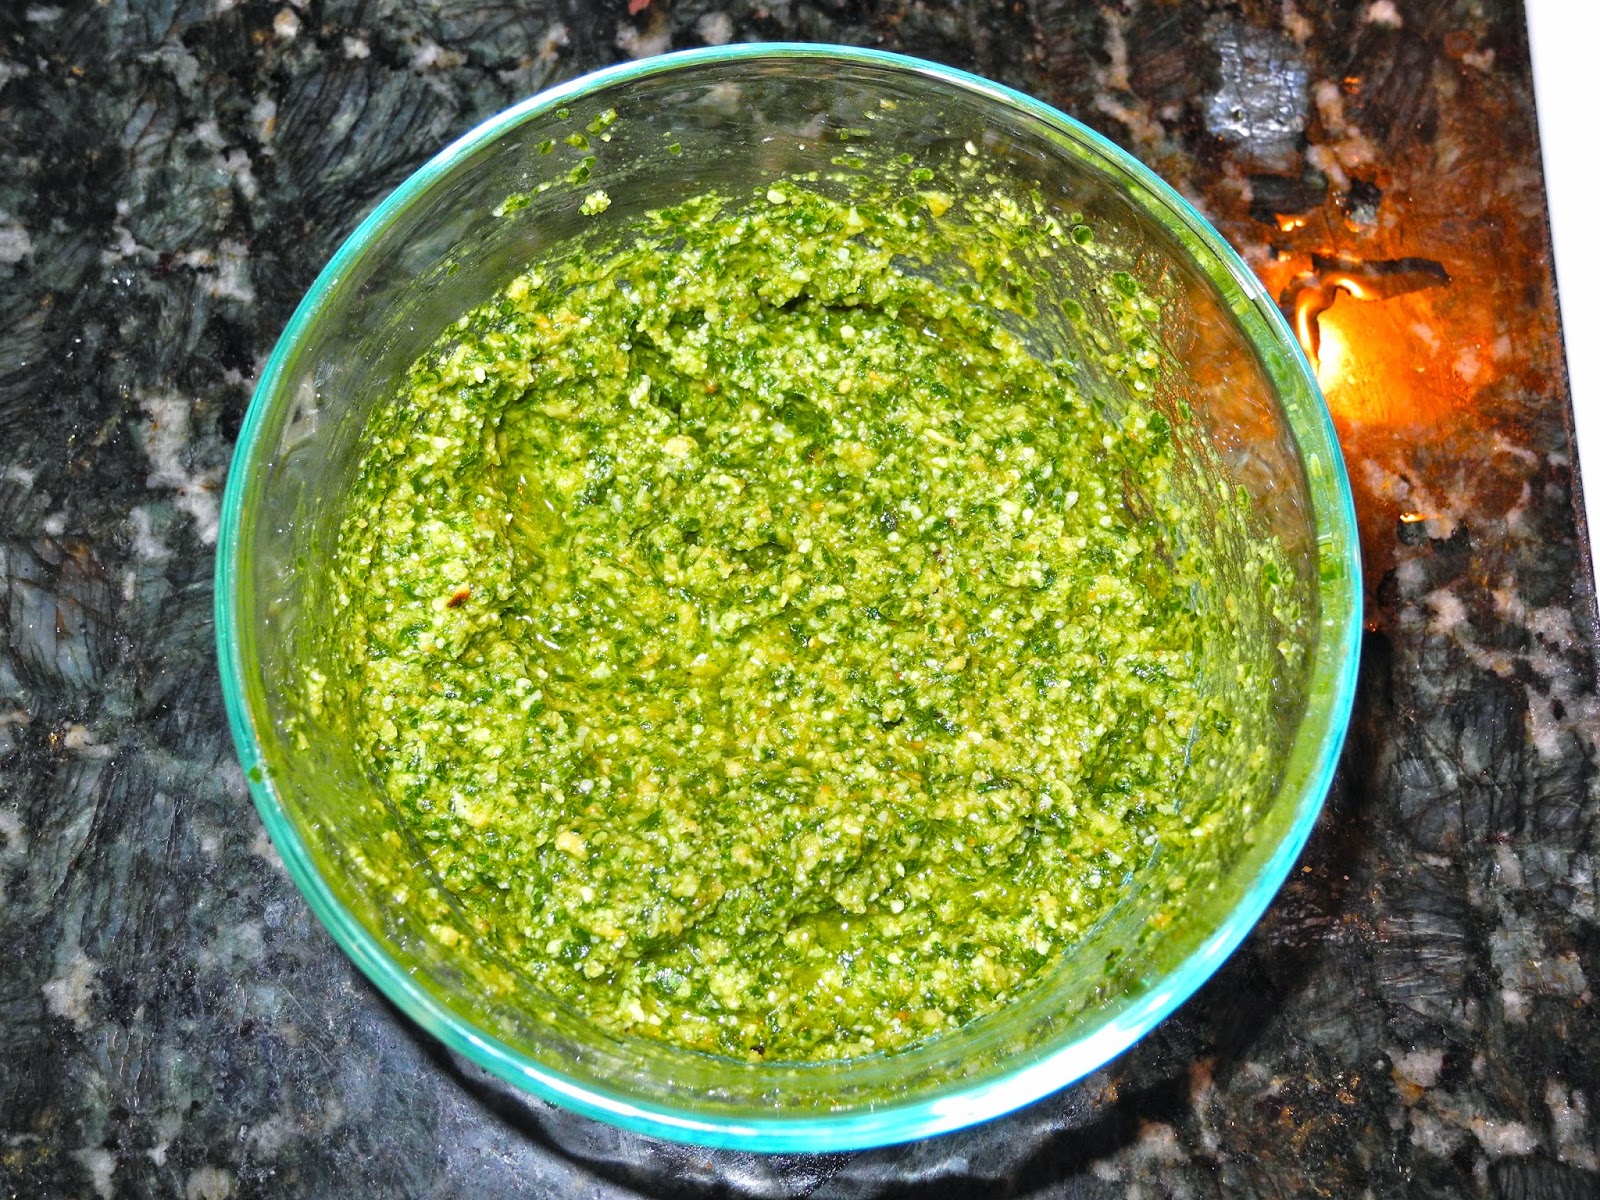
Back to Basics: Basil Pesto

With spring in full bloom, there is nothing that I want more than fresh herbs. Chopped herbs in my salads, on my chicken, in my pasta...I'll add them to anything!

This pesto is chock full of basil and makes the perfect sauce for the warmer season.  It's so easy to put together and is so versatile! I put this on top of my roasted salmon, add extra oil and turn it into salad dressing, and of course, as a sauce for pasta. 

This recipe is from Cook's Illustrated, which always has impeccable recipes. It does not disappoint!

Basil Pesto

1/4 cup pine nuts
3 medium garlic cloves, unpeeled
2 cups fresh basil leaves, packed
7 tablespoons extra-virgin olive oil
1/2 teaspoon salt
1/4 cup freshly grated Pecorino Romano
Ground black pepper

Toast the nuts in a small skillet over medium heat, stirring frequently, until just golden and fragrant, about 5 minutes; set aside.

Add the garlic to the skillet and toast over medium heat, shaking the pan occasionally, until fragrant. Let the garlic cool slightly, then peel and chop.

Place the basil in a heavy-duty 1 gallon zipper-lock plastic bag. Pound the bag with the flat side of a meat pounder or a rolling pin until all the leaves are bruised.

Process the nuts, garlic, basil, oil, and salt in a food processor until smooth, stopping as necessary to scrape down the sides of the bowl, about one minute. Stir in the parmesan cheese, and then season with pepper to taste.

Wednesday, May 14, 2014

Back to Basics: Poached Eggs with Ramps


I am about to change your life. Seriously.

Okay, maybe not so seriously. But trying ramps a few weeks ago WAS a life-changing experience for me, and it could be for you too.

Now, you are probably thinking to yourself: 1) what in the world is a ramp? and 2) why is it life-changing?

Ramps are garlicky-spring onions that bring a garlicky punch that mellows as you cook it. If you like garlic and onions, you will LOVE ramps.

Now, for the sad part...ramps are typically only available late March through June. Also, it's very rare to find them at the grocery store. You'll be better off looking for them at your farmer's market. 

This poached egg recipe below is my favorite way to make ramps. It showcases the ramp flavor beautifully, and though the finished product looks pretty impressive, it only takes about 15 minutes to make. 

Serve this poached egg and ramp recipe for brunch or turn it into your next Meatless Monday dinner. 

Why is this recipe part of my back to basics series? Even though ramps aren't necessarily a basic ingredient, poached eggs should definitely be in your repertoire.

Enjoy!

Poached Eggs with Ramps

Inspired by Bon Appétit Magazine

1 pound ramps
1/2 stick (1/4 cup) unsalted butter
Kosher salt
Freshly ground black pepper
4 slices country style bread
4 poached eggs (recipe below)
2 tablespoons olive oil
Flaky sea salt (like Maldon)

Rinse the ramps really well in cold water. Cut dark-green leaves from ramps and slice into 1" thick sections. Trim off the end of the bulbs. Slice the rest of the bulbs and stems into 1/4" thick sections.

Heat butter in a medium skillet over medium heat. Add the bulbs and stems, then seasons with salt and pepper.  Cook, stirring often, until the bulbs and stems soften (about 5-8 minutes). Then add in the leaves and continue cooking for approximately 3 minutes, until the leaves soften.


Toast bread, then brush with olive oil. Top each piece of toast with ramps and then a poached egg. Drizzle with olive oil, and then top with a sprinkle of flaky sea salt.


Poached Eggs

1 tablespoon distilled white vinegar
4 large eggs

Bring 2" of water to a boil in a large saucepan. Reduce heat so water is at a gentle simmer, then add the vinegar. 

Crack an egg into a small bowl. Gently slide the egg into the simmering water. 

Repeat with remaining eggs, waiting until the whites are opaque before adding the next egg (you should wait approximately 30 seconds between eggs).


Poach for about 3 minutes--the whites will be set, but the yolks will still be runny. Using a slotted spoon, transfer eggs to paper towels as they are done. 


Monday, April 7, 2014

Back to Basics: Pasta

Yes, I know you think you know how to make pasta. I'm here to tell you that while you probably know the basics, there are quite a few pro tricks that I recently learned that make a HUGE difference.

Pasta is great for so many reasons--it's quick to make, it can feed a crowd, and pleases both vegetarians and meat-lovers. Since it's likely in your weeknight arsenal of meals, why not make sure your pasta is perfect?

The Perfect Way to Cook Pasta

1. Boil Water


I know--you already know how to boil water. Great--just make sure you use at least 6 quarts of water per pound of pasta.

2. Salt your water.


Once the water is boiling, add a lot of salt to the water. Typically, you should add 1/4 cup of salt for every six quarts. The salt will season your pasta so that you are not putting delicious sauce onto bland boiled dough.

3. Cook to al dente.


Literally meaning "to the tooth", al dente is the true Italian way of cooking pasta. Your pasta should have texture and firmness, but is should NOT be crunchy. Typically, packages are pretty good at estimating al dente cooking times, but start checking the pasta two-three minutes before just in case. It's better to check too early, than to check too late!

4. Save the pasta water!


Instead of simply draining your pasta over the sink, letting all of the pasta water go to waste, save two cups of the liquid.  The water has a lot of starch and salt that will help balance out your sauce, no matter whether you made it yourself or you are relying on trusty Trader Joe's.

5. Use a saucepan and tongs.


When it comes to actually combining the pasta, sauce, and pasta water, use a saucepan and tongs. Over medium heat, add in the pasta, sauce, and a splash or two of the pasta water. Then, use your tongs to toss the pasta so it is evenly coated with sauce. The tongs also make serving pasta so much easier.

Top with freshly grated Parmesan, and then your pasta is ready to eat!

Monday, March 10, 2014

Back to Basics: Oatmeal

             
Poor oatmeal. I often think of it as a neglected breakfast food. At a weekend brunch, it seems plain and ordinary compared to waffles, pancakes, and eggs. During the week, it can be difficult to actually take the time to sit down and eat a hot breakfast before leaving work.

However...oatmeal is actually one of the most perfect weekday breakfast foods. I make a large pot of oatmeal Sunday night, and then simply store it in the fridge during the week. I can easily pack a to-go container of oatmeal for days when I have early morning workout sessions and want to eat breakfast at work instead. If I'm at home, I quickly heat up the oatmeal before making myself some coffee

I fluctuate between toppings--some days I prefer pecans, berries, and a little bit of greek yogurt on top of oatmeal, and on other days, nothing but bananas and brown sugar will do. One thing never changes though. I always, always, always use McCann's Steel Cut Oats. It's simply the best oatmeal around.

Oatmeal

Makes approximately four servings

1 cup dry McCann's Steel Cut Oats
4 cups water
Pinch of salt

Heat four cups of water in a pot until it is briskly boiling. Sprinkle in the oatmeal, stirring well.
When the porridge is smooth and begins to thicken, reduce heat to medium and cook uncovered for 30 minutes, stirring occasionally. The oatmeal should then be ready to serve with whatever toppings you see fit!

Tuesday, February 25, 2014

Back to Basics: Eggs over Easy


Breakfast is probably my favorite meal of the day. I could eat eggs, french toast, pancakes, and any other early-morning food at really any point in the day.

For me, eggs are only perfect if they are have a wonderfully runny yolk to mop up with toast. My grandmother and sister were infamous for hating runny eggs. I never quite understood the appeal of an egg over hard. Though my grandmother, stubborn as she was, never outgrew her distaste for runny yolks, I am so glad my sister and I have similar egg preferences now...it makes it so much easier to share when we go out for brunch!

These eggs, eggs over easy, are fried eggs that have been cooked on both sides, but still retain the perfect bright yellow soft yolk. Not only are these eggs a great way to start the day, they work perfectly on top of brown rice, greens, or in a sandwich for dinner.

I know it's a Tuesday. You're probably going to rush out the door on your way to work with just a cup of coffee and a banana in hand. I challenge you though to sit down one day this week and eat a real breakfast. Eating a real breakfast during the week, even though it only takes about 10 minutes, feels so luxurious, and the extra protein will keep you powering through those Excel and PowerPoint slides until lunchtime. 

Hope these spruce up your typical breakfast routine!

Eggs over Easy

1 tablespoon butter
1 egg

Over low heat, melt the butter in a small saucepan.  

When the butter begins to foam, crack the egg into the pan.

Cook over low heat until the whites become opaque.
When the whites are opaque, jiggle the pan to loosen the egg.  

Using a spatula, gently flip the egg over.  Cook the egg for 10 seconds.

After 10 seconds, serve the egg with toast.

Friday, February 21, 2014

Back to Basics: Roasted Salmon


Some days, I want nothing more than to come home and collapse. This whole week, I have felt one step behind on everything. My to-do list keeps managing to get longer instead of shorter, and there never seem to be enough hours in the day. There are some days where I do not get home until 7:30pm/8pm or so, and all I want is a chef to make me a homemade meal, and a cleaning staff to take care of the kitchen afterwards.

Instead, I am left either with a box of take-out or staring at a fridge with no idea what to make. Luckily, this salmon recipe is healthy, simple to make, and easy to clean up.  I pair it with leftovers in my fridge (salad, quinoa, roasted veggies, leftover pesto, etc) to make a full meal. This recipe is plain, but an essential recipe to have up your sleeve.

So while I cannot bring a chef to your door on the nights you work late, I can bring you a delicious recipe that is ready in under 15 minutes.

Roasted Salmon

Makes enough for one serving
1 3 oz fillet of salmon
Salt
Pepper

  • Preheat oven to 350 degrees.
  • Season salmon with salt and pepper. 
  • Place fish, skin side down, on a non-stick cooking sheet. Cook in the oven for 6-8 minutes.  
  • The salmon should flake well when done, and be very firm.

Friday, January 17, 2014

Back to Basics: Chicken Soup


Chicken soup is one of the most important "need to know" recipes.  Whether you are sick or you simply want a bowl of delicious soup that instantly reminds you of home, this soup fits the bill.

Simply dump all the ingredients into a pot, and then let it sit on the stove for 3-4 hours.  Yes, it does take a while to make, but your patience is well worth it.

When it's cold out, and you're not leaving the house anyway, why not throw this on the stove?  It's a perfect winter lazy day recipe.


Chicken Soup
Makes about 6-8 servings

1 5-6 lb chicken (I used two 3 lb chickens)
1 1/2 onions, peeled and cut in half
4 carrots, washed
6 stalks of celery, including leaves (feel free to trim an inch or two off the bottom though)
15 springs of parsley
7 sprigs of dill
1 tablespoon kosher salt
1 teaspoon black pepper
  1. Rinse both the inside and the outside of the chicken with cold water.  Pat thoroughly with a paper towel to dry.
  2. Place chicken in a large stockpot.  Then add the onions, carrots, celery, parsley, dill, salt, and pepper.
  3. Fill the rest of the pot with filtered water.
  4. Bring the pot to a boil, and then let it simmer for one hour. 
  5. After one hour, remove the chicken from the pot.  Let the chicken cool slightly.  Remove the breast meat from the chicken, using a knife or kitchen scissors.  Set the breast meat in the fridge, and then return the rest of the chicken to the pot.
  6. Let the soup simmer, uncovered, for three more hours.  
  7. Remove the soup from the heat. Strain the soup through a fine mesh strainer.  Take the leftover vegetables (onions, carrots, and celery) and dice them,  Add the vegetables back to the broth.  
  8. Cover the broth, and let it chill in the fridge.  The fat will separate from the broth.  Use a spoon to remove any fat that rises to the surface.
  9. Shred leftover chicken breast from step 5 using either your hands or a fork.  Add the breast meat back to the soup.
  10. To serve, simply heat the broth again on the stove.  If you prefer, you can add in fresh parsley and dill.   

Sunday, December 29, 2013

Back to Basics: French Toast


For years, I served as my dad's sous chef. He taught me almost everything I know about cooking, and he inspired my love of food.  Nowadays, there are few things my dad will willingly admit I cook better than he does.

However, this French Toast recipe is an exception. My dad and my siblings request this recipe every time I come home.  The vanilla and sugar in the recipe lends a slight sweetness to the French Toast, but it is not overwhelming or cloying.  

Buy yourself some challah, invite your friends or family over for brunch, and impress them with this recipe that is ready in under 15 minutes!

Challah French Toast
Adapted from The Best Recipe Cookbook
Makes 4-5 slices

1 large egg
2 tablespoons unsalted butter, melted, plus extra for frying
3/4 cup milk
2 teaspoons vanilla extract
2 tablespoons sugar
1/3 cup all purpose flour
1/4 teaspoon salt
Dash of ground cinnamon
4-5 slices of day old challah, 3/4 inch thick

Heat 10- to 12-inch skillet over medium heat for 5 minutes.

Meanwhile, beat egg lightly in shallow pan or pie plate.  Whisk in butter, then milk and vanilla, and finally sugar, flour, salt, and cinnamon.  Whisk until smooth.

Soak bread in the egg mixture (but try not to oversaturate!) for about 40 seconds on each side.  Swirl 1 tablespoon butter into the hot pan.

Pick up bread from the egg mixture, and allow extra mixture to drip off.  

Place the prepared bread in the skilled, and cook until golden brown (about 1 minute and 45 seconds on the first side, and about 1 minute on the other side).  Serve immediately!
 

design + development by kelly christine studio